|
While I cycle around town, either towing my cargo trailer, or riding Kyoto, my cargo trike, I have hoped that I can show that bikes can often take the place of gas-burning machines when it comes to moving stuff. This example happened recently when my friend Bridget saw me moving things this way. She has a car, but like most sane people doesn't want to use it any more that necessary, so she asked if I could build one for her. Since completing my first trailer, I had built a second one for my friend Jack, and it was more or less identical. This time, a larger size was needed, since Bridget wanted to be able to haul her large African drums, and also take her large dog to the park. To carry all the drums we measured that the trailer box had to be 20" wide by at least 50" long. A bit of a beast, but quite workable (the dog will be contained in a foldable wire enclosure that will later be modified to fit the box). The frame would be the same as before: two lengths of 10' EMT pipe (from the local metal salvage yard, though they can of course be bought new), with bent steel plates for axle mounts, and so on. A conduit bender is essential, as it is otherwise rather difficult to curve the EMT pipe. I bought mine, but I've heard you can rent them, and they come with instructions on how to figure out where to make your bends. IMPORTANT! Like my other trailers, this one is bolted together, not welded. You could weld it, but this tubing has a zinc oxide coating, which gives off very nasty fumes when melted. I'm told that one should only weld this outside on a windy day, and even then a respirator is a good idea! Using bolts means you can do it yourself (since most of us don't have welding gear on hand), and it doesn't add too much weight. Use nylock nuts (the kind with the plastic insert) and the bolts won't come loose due to vibration. Since I don't have a shop the build was done outdoors, as this rig was a bit too big for working in my back room. It was not the easiest way to do things (one sometimes has to track down small bits lost in the grass), and made for some less than precise work, but hey, the trailer seems just fine. The best part about this project is that I had my camera to photo-document the entire process. So for those that have followed the build instructions on my other trailer page and have been wishing for visuals, here they are! (Usual disclaimer: this is not my design, and I am only sharing how I put this together for your enjoyment. I cannot be held liable if you build a trailer using these instructions and it somehow impacts negatively on your life.) UPDATE: While my friend remains pleased with her trailer, one design flaw that has come up is that the side tubes flex too much with a heavy load. The inside tubes get pushed down by the box and thus pull the axle plates in, resulting in the tops of the tires scrubbing against the box. The box is only bolted to the tubes at each end, so a simple remedy is to add another pair of bolts in the middle. But of course there's always going to be a limit has to how much side load those thin axle plates can take. |
| PICTURE | DESCRIPTION |
|
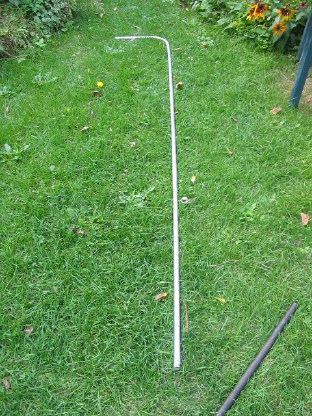
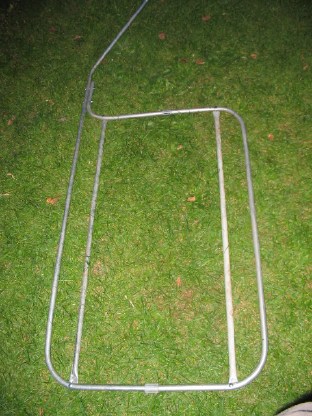
Take one pipe, and using the conduit bender we make the first bend, which will be at the rear of the frame. |
|
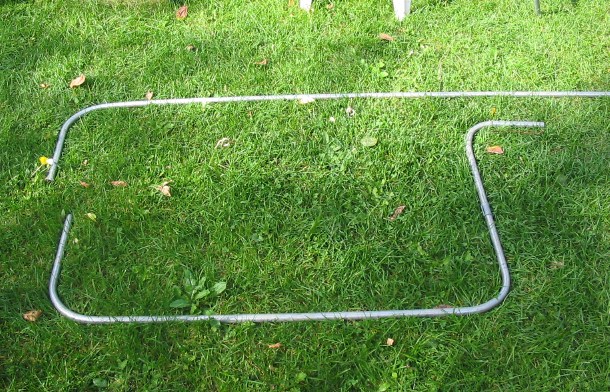
The second pipe, bent in three places. The first is to meet the other pipe at the rear, the second to enclose the frame perimeter, and the third been the opposite direction to join this pipe against the first one. Measuring and making this last bend can be a bit tricky. You have to remember which way the bender goes, so that you don't end up bending the wrong way! And you'll have to stand the bender so that its head is up, and bend the tube around it instead of vice versa (trust me, you'll understand once you get to it). |
|
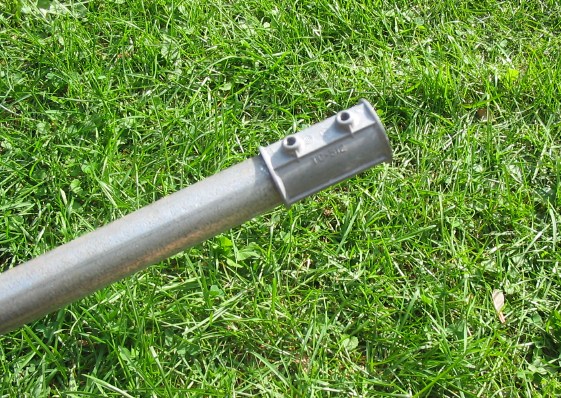
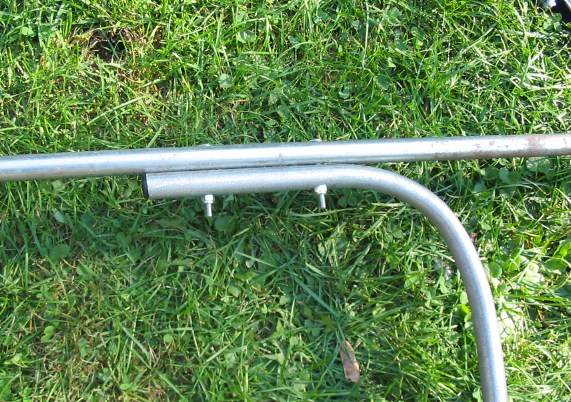
At the rear, slide on a pipe connector. This sleeve has an inner ridge that the pipe will stop against. |
|
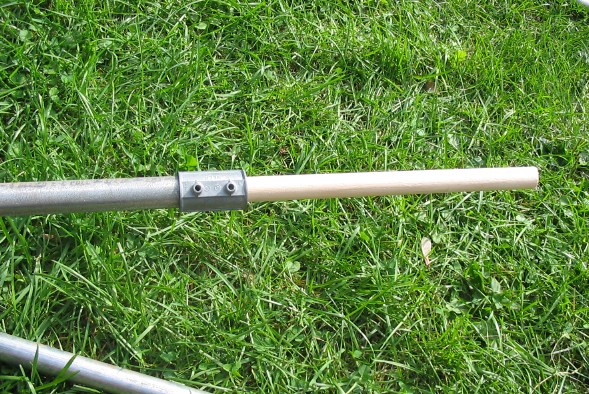
While the connector is fine for holding the pipes together when they are clamped against a wall or wherever for their intended use of enclosing electrical wires, this join is probably not going to be strong enough for a the sort of stresses a trailer frame will be under. So I insert a length of hardwood dowel to add strength. |
|
But alas, I couldn't find a dowel that fit perfectly (either just undersize, or just over), so I wrapped it with a few passes of electrical tape to thicken it up. |
|
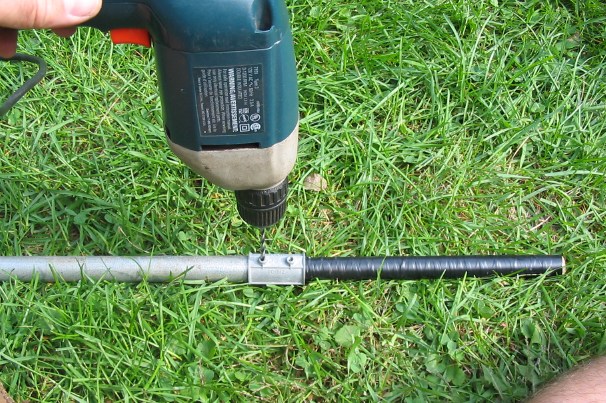
The connector has two bolts that tighten down against each end of pipe, but I wanted to go right through each pipe and into the dowel, so it was time to drill that out. |
|
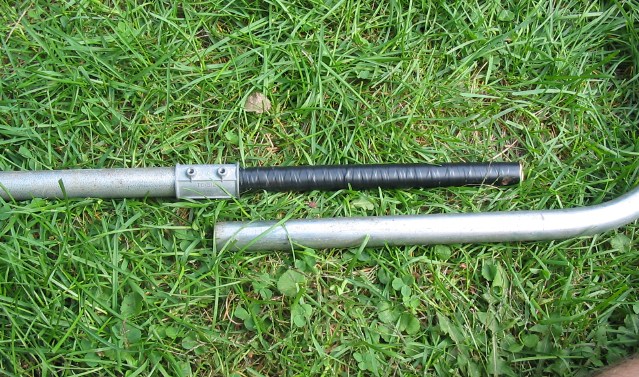
End result. |
|
The two pipes need to be joined at the other end as well. With my first trailer I found that when tightening the outermost bolt the tube would start to crush (due to the proximity of the open end). So this time I did the dowel trick again, capped off with a bike handlebar plug. |
|
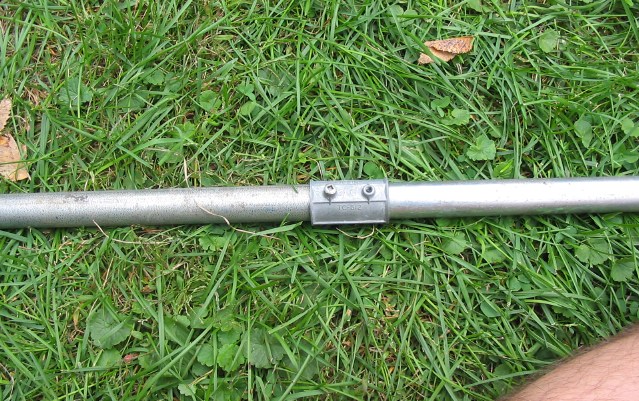
Bolted together, and the excess bolt lengths were later sawn off. |
| oops, no photo taken! | The hitch end of the pipe needs to be cut to length. But first, bend the pipe inwards and up a bit, since the attachment point at the bike's rear axle is higher up than the height of the trailer on smaller wheels (ignore this if using same size wheels, of course). The end of the pipe needs to be long enough to give some room between the trailer's front and the bike's tire, but viewing other trailers will show that you don't need a lot of space there. Also, don't bend the pipe so that this end is on centre with the trailer, since the hitch attaches to the left of the the bike's axle. This measurement does not have to be perfect, since the bike will pull the trailer no matter where it rides behind it. |

|
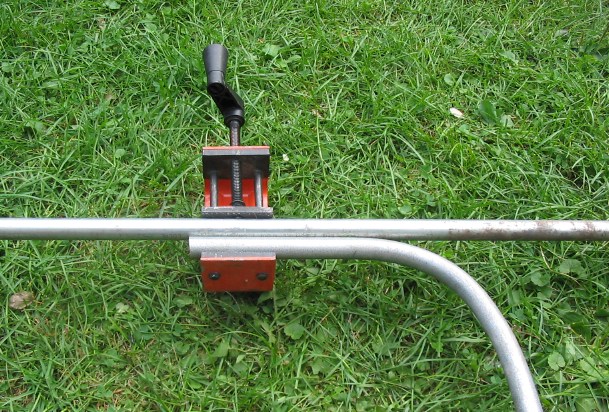
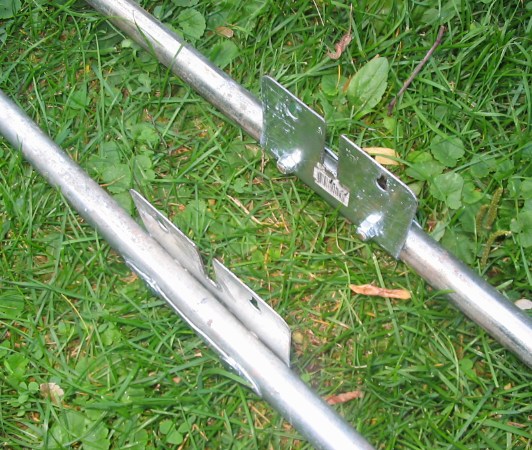
For the axle plates you'll need four 4" electrical box covers (avail. at most hardrware stores). Clamp one in a vice, and at 6.5 cm (2.5") from one side, drill a 1 cm (3/8") hole, then saw a slot of the same width down to it. |
|
Each plate needs to wrap around a tube. So using a scrap piece of EMT, clamp the plate to it, and carefully bend it around using your hands. |
|
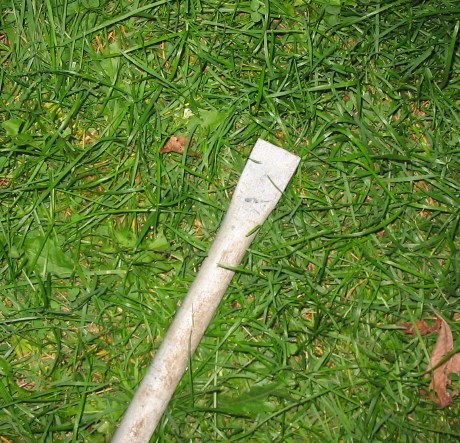
Now you need to get together the inner pipes that will make the wheel housings. You should have two pieces leftover from your pair of ten-footers to make these. If your trailer is going to be long like this one, make sure you have a third pipe on hand. Flatten each end with a hammer, and then... |

|
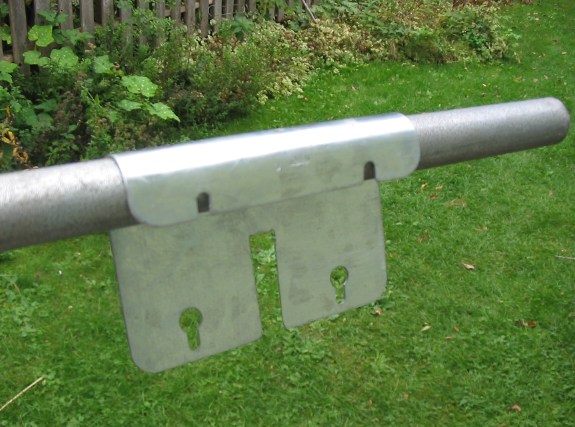
... fit it under the frame. (Under adds strength to the pipe where it meets the frame, since the frame will be pushing down with the weight of the cargo.) |
|
Both pipes bolted into place. Once installed, hammer the ends (if they extend a bit) so that they follow the curve of the pipe. |
|
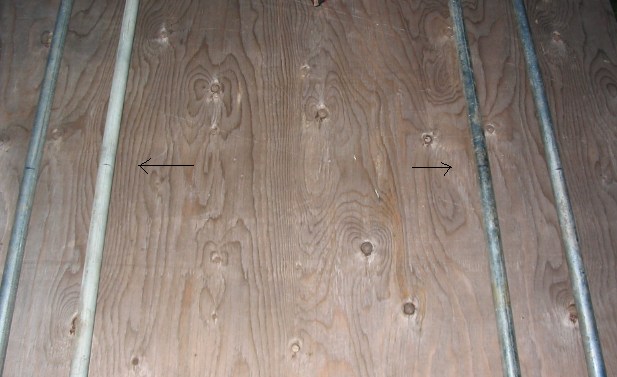
Now you need to mark off the center point of the frame on each pipe. This will be your reference when lining up the axle plates. |
|
Slide each pair of axle plates in place, and use some sort of straight edge (a non-warped yardstick is good) to make sure each plate is lined up in with the other three so that the wheels will be parallel. Drill two 1/4" holes in each plate so that the bolts start on one side of the wrapped plate and come out the other. |
|
Here's how it should look when done. |
|
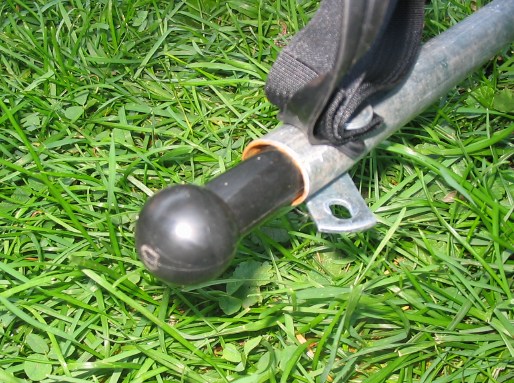
The hitch is a commercial design from a Canadian company called Chariot Carriers. I found that one can purchase these hitches separately because Chariot went to this design from the ubiquitous chainstay clamp, and offers these as retrofits. Here is the ball end fitted into in the pipe. |

|
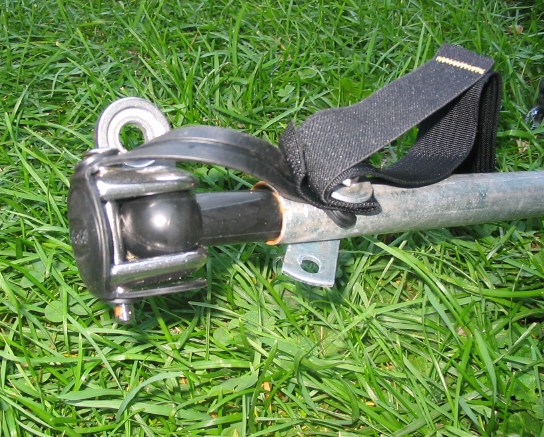
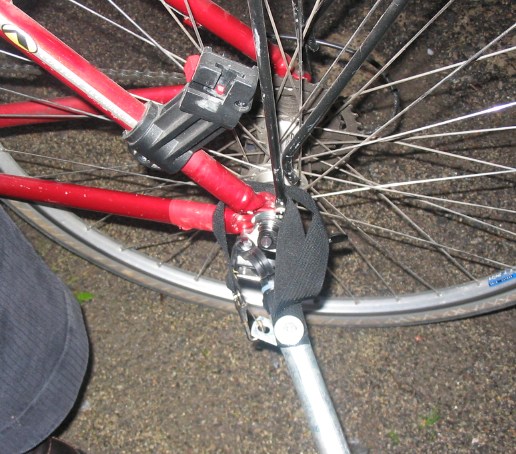
The ball fits into this metal receiver, which attaches to (and stays with) the bike's rear axle. |
|
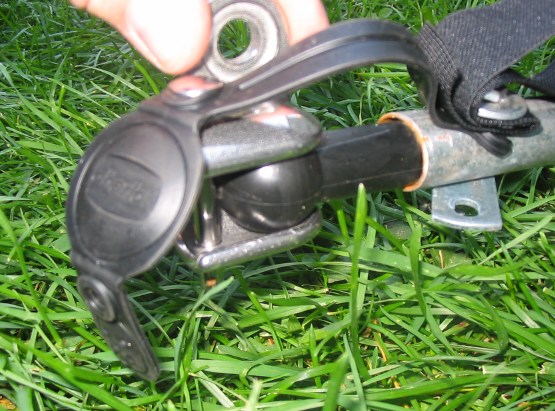
A plastic strap helps hold the connecting pin in place... |
|
... like so. Note also the safety strap. |

|
I slid on a coiled cable to help lock the trailer to the bike when parked. |
|
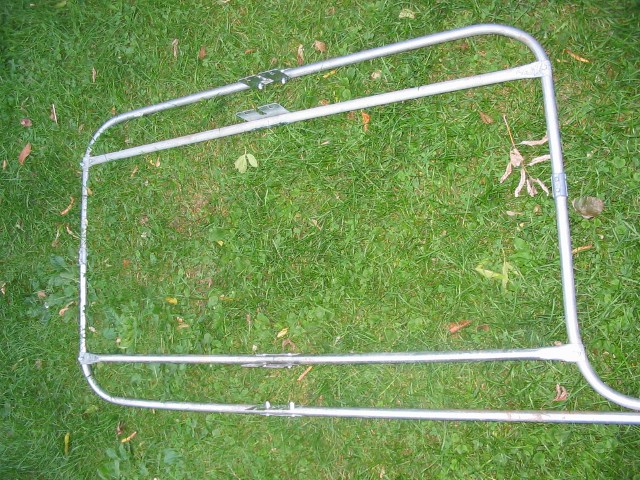
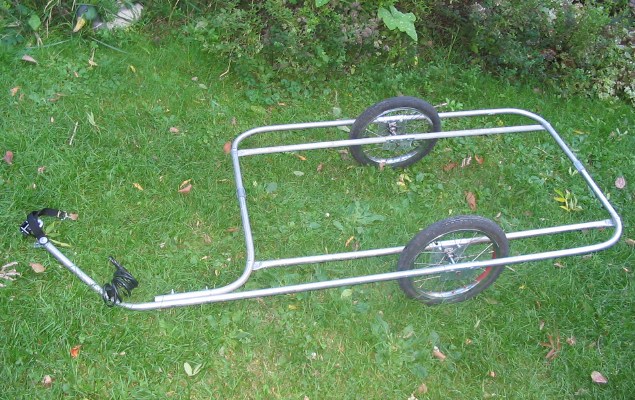
The completed frame with wheels! While some folks often just add a flat platform I find that then one has to use straps and whatnot to keep things in place (and out of the wheel spokes!). So at least add some sides - if you've never used a cargo trailer before you'll perhaps appreciate this advice once you've tried to move stuff. ;) The rest of the photos show what I built for Bridget's requirements. |

|
A box can be done one of two ways. It can be dropped between the frame members (as in my first trailer), or it can ride on top. We decided to with 16" wheels (instead of 20") to keep the height down, and this way the box could sit on top of the frame. For now we decide to keep things cheap 'n simple, so we used scraps of plywood. The photo shows a piece of 3/8" attached to the frame, with aluminum "L" channel used for attaching the bottom to the sides. (Again, try your local scrap metal dealer, as I picked up 50' of this stuff to $10!) I used this same concept for the box of my cargo trike. |
|
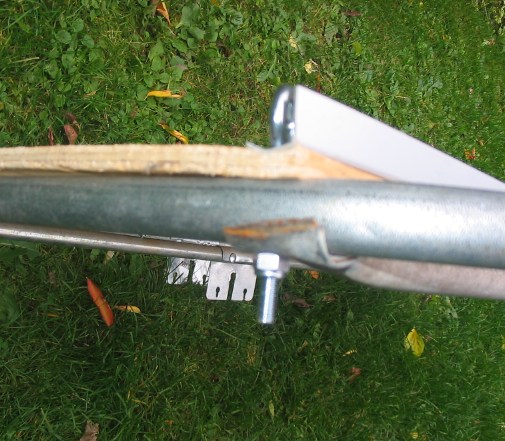
The box was attached to the frame at each corner. After a bit of thought, I removed the rear mounts for the inner wheel housings and replaced them with longer eye bolts as shown. These eye bolts were used in many places as tie-downs for ropes or bungees. |

|
The assembled box. I'm not a very patient carpenter, especially when working with crumbly old wood, but it'll do the job until Bridget decides if she wants a better box made from outdoor grade wood or whatever (just unbolt the old wood and install the new!). |

|
A tailgate was specified. So I had to figure out a way of attaching the top of the gate so that it would not move when in place (since stuff might be pressing up against it), but could easily be undone, and not also have any heavy hardware. During a browse through the hardware store the idea of using turnbuckles came to mind. Just turn them a bit and lift, and they release the gate! |
|
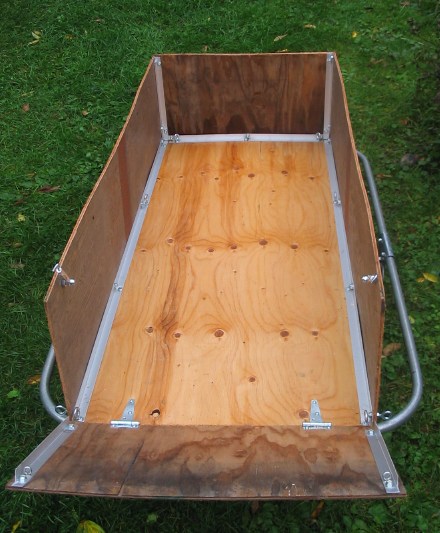
The completed box with open gate. |
|
Hitched up to Bridget's bike. You can see how it all fits together, along with the safety strap. Her bike's frame is aluminum, and its fat seatstays got in the way of the pin. So I installed two large washers to move this connection out a little. The hitch ball did not fit into the receiver smoothly unless the bike was tilted slightly, so the bender came out for one last adjustment to tilt the end of the pipe down a bit. |

|
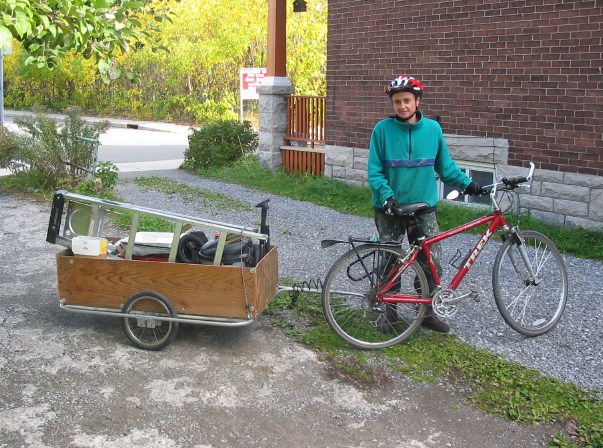
A happy customer with the (almost) finished product. I had been tightening the last bolts down just before she arrived. |

|
The rear of the trailer needs to be made visible for night riding, so B. is going to add a red LED light at each side once I get the brackets attached. |
|
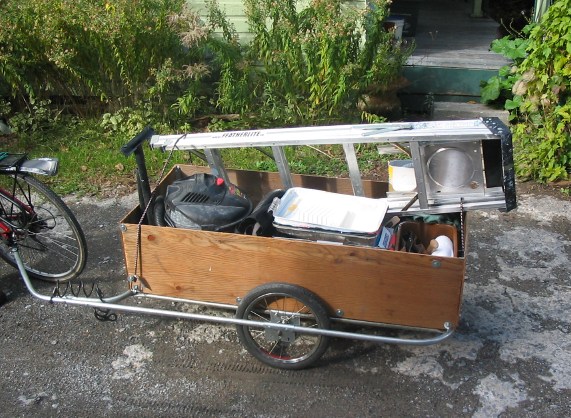
She dropped by a few days later to show me how well it also moves her painting gear. |
|
Same. |